
DIY Kitchen Makeover on a Budget-Beginner's Story
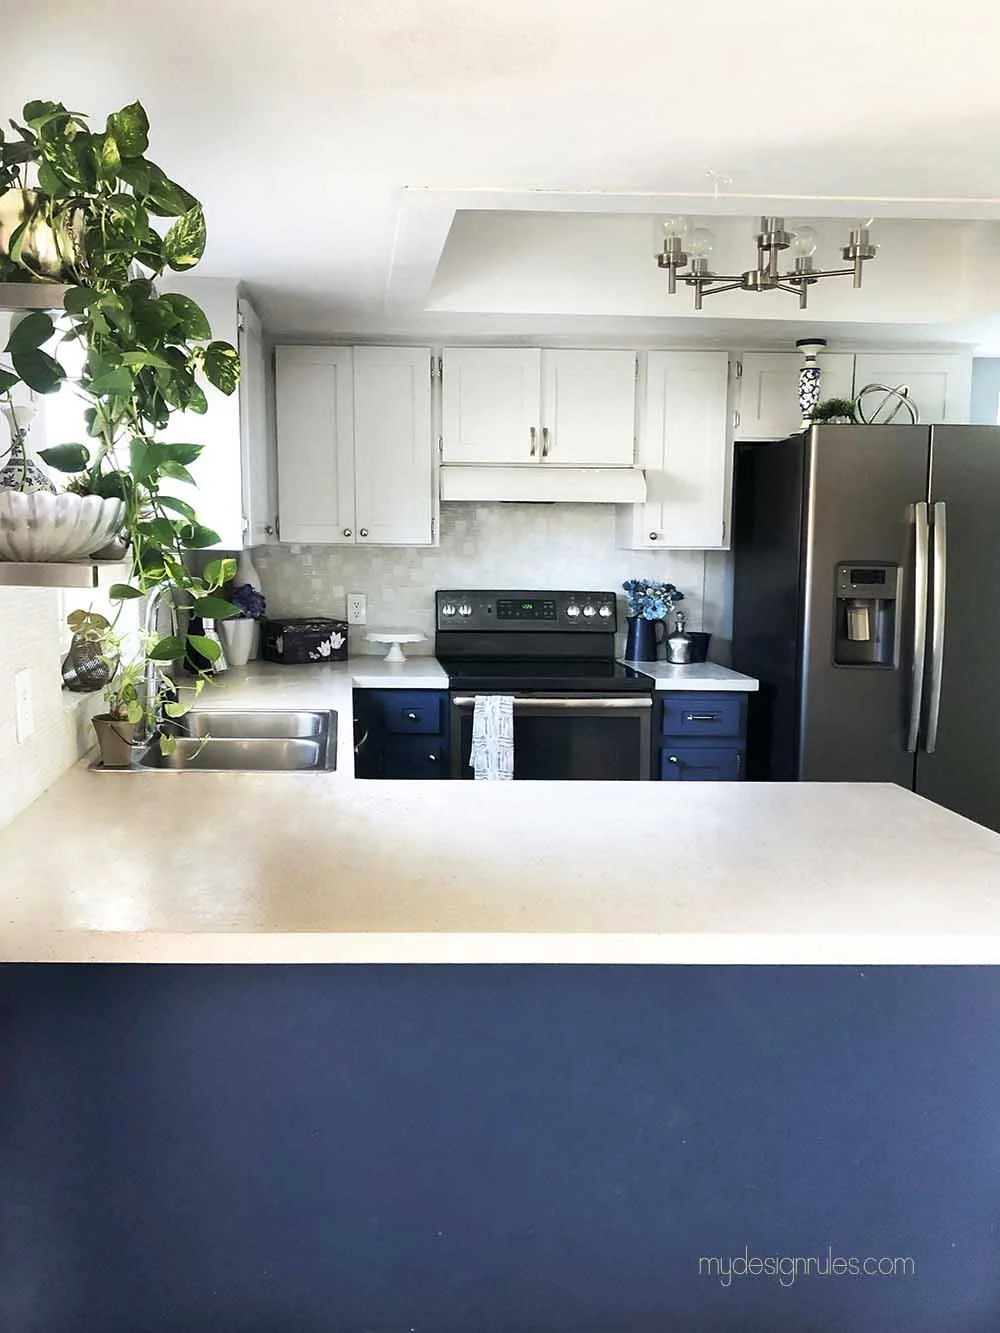
If you want the crown for the most boring and ugly kitchenon the planet, I am gladly handing it over to you. I wore it for quite a while,but alas I finally moved on when I got the grit and the gumption to makeover mykitchen on a low budget. Even if you’re a beginner DIY-er with patience you cando this!

Now, it was not easy. It was not as cheap as I had hoped (my budget was $2000 including appliances which took me a long time to come up with), and it was not perfect. But it literally changed my bad attitude about my entire home. Once I began DIY’ing my kitchen, it lit a fire under me to create and decorate a home I had lived in for 13 years but never put any effort into making it beautiful.

Then one day I just got tired. Tired of walking into the vanilla mess of a kitchen with its raggedy cabinets, burned countertops, and 1980’s styling. I stopped feeling sorry for myself and got to work.
I started with a mood board and came up with this:

EASY DIY Kitchen Makeover Projects for beginners
I attacked the kitchen based on my beginner DIY skill level. At that time, I had very little. I’d painted, recovered some chairs, patched some wall holes and stained a bookcase. But other than that, I didn’t know much. To test out my design scheme and paint skill, I chose to do a mini-makeover of just the kitchen corner.
After that success, I was psyched to get started.
DIY Kitchen CountertopMakeover
I began with a makeover of the damaged laminate countertops. For this project, I began by removing the backsplash portion, followed the Daich Coatings instructions to a T and got stunning results.
From warn laminate to a stone look-a-like (and a little bumpy texture I wasn’t thrilled about). Overall the countertop makeover was extremely easy. If you can read, paint and sand, you can do it.
Opening Up the Kitchen

Next up I took down the upper cabinets that separated the kitchenfrom the dining room. This changed the feel of the kitchen. It only involved usinga drill to unscrew the cabinets and patching wholes. After removing the uppercabinets, I added open shelving to the wall. (This was a straight forwardproject—I didn’t feel the need to post about it.)
Making the Shaker Cabinet Doors
I am not gonna lie. DIYing these shaker doors was a beast of a task. I wish I could tell you how long it took me, but I worked on it over the course of a few weeks. Remember I had no real DIY skill, so I researched and learned on the job. If I had to do it over again, I probably would have gone with wood instead of MDF, but the MDF worked out just fine. I had to buy all new hinges and my cabinets underneath the sink had suffered so much water damage that I had to totally build new ones.
But the effort here paid off BIG TIME. It made all the difference in the world in the finished kitchen.
Now that the hardest part was over, I moved on to paint. I used Sherwin Williams Proclassic Reflections mixed a little brown paint from the garage (because it was too cool and I was too cheap to buy more paint) for the upper cabinets and Sherwin Williams All Surface Enamel in Indigo Batik for the lower cabinets (Proclassic can’t be mixed in darker colors.) Make sure you read my post on Best Paint For Laminate Cabinets before you paint!

SO GLAD I took the risk of blue and didn’t go with gray! I also wish I had painted underneath the upper cabinets!
Now I told you I was a beginner DIY-er at the time, and umm, my peel and stick glass backsplash endeavor went just ok. I made some errors and after it was all said and done sometimes I loved it, sometimes it reminded me of That 70’s Show. I did see the Property Brothers use it twice on their Buying and Selling show…so there’s that. Overall, it’s beautiful but I wish I had found a translucent grout. It also wasn’t the cheapest option either.

New Appliances
At this point, I was able to score an amazing deal on appliances via Offer Up. You seriously need to check out local selling groups for deals. Instead of using the smelly microwave that came with the set, I opted to paint a cheap white vent hood. That cost me less than $50. It also helped tame the color scheme. I really didn’t want to interrupt the light gray cabinetry with the gray microwave or cover up my backsplash.

I tried my hand at making a valance for the window. That turned out fantastic!

At that point, the finish line was almost in sight.
DIY LVT Flooring
A Friend and I installed these beautiful luxury vinyl planks. The flooring took the kitchen from ho-hum to va va voom! My kitchen was all dressed up, but it was hard to get past those dated floors. It was like having on a cute outfit and raggedy shoes-- not the bizness!

Oh and you also couldn’t look up!
Last up was updating the fluorescent lightbox (Talk about ugly!). After buying the light in the original mood board, I realized it was too BIG. UGH (always check measurements) I never found anything I absolutely adored, but I had to do something with that giant mess. So I bought a pretty-ish light and painted the ceiling. And finally—I was done.

Overall I spent just under $2,000, which was my goal!
Daich Countertop Coating Kit (See Price on Amazon)
Open Shelving
$45
Shaker Cabinets Supplies (including power tools)
$150
Paint, Hardware and supplies
$200
Backsplash and Supplies (the price on this has since doubled-- don't do it!)
$250
Flooring (including tools)
$318
Appliances
$650
Light Fixture (See Price on Amazon)
Faucet (No longer available on Amazon)
TOTAL
<$2000
Whew. It was quite a ride. But do you see what I see? A beautiful, functional kitchen that I literally can say I built with my bare hands. So if you're on the fence about tackling your own DIY Kitchen makeover on a budget--jump off now! Yes, you will make mistakes, no it won't be perfect, but it will be worth it.