

Oh the 1980’s brass chandelier. Seems like every house built in that decade sported one of these. And I still had one hanging over my dining room table that was in need of a serious makeover. (I’m horrible at taking before pics, so the one below is a stock photo. Mine was not as pretty in person.)

Let me remind you that I spent 13 years in my home before I started decorating. And thus, I haven’t changed out any of the lighting in the house. I’m redesigning my entire home on a serious budget. At the beginning of my venture, money was extremely tight, so I used whatever pennies I could scrape up to complete small projects here and there. I never had a furniture or fixture budget, I just worked with pieces on hand and tried to update them a bit. This turned out incredibly beneficial because it allowed me to learn my signature decorating style, fine tune DIY skills and navigate the design process without spending a fortune.
This post contains affiliate links. If you make a purchase after clicking on a link, I make a small commission at no cost to you. Read my full disclosure here.
These brass chandeliers actually have great bones. The curves are classic and I have an affinity for traditional décor; however, the cheap-looking brass finish is just well, cheap looking. On a whim one morning I decided to give it a refresh.
I originally planned to take the chandelier down and spray paint it. That was a fleeting thought because my inexperience with electrical wiring and fear of getting shocked scared any creativity out of me. Plus, my husband was at work and I dared not take it down without being able to get it back up there.
I thought about building a spray tent in the dining room but was too lazy to figure all that out. Alas, necessity is the mother of invention. I searched feverishly through my craft and event supplies and came up with a super cheap solution: Rub ‘N Buff. Perfect. I pulled out the ladder and got to work on the chandelier. The whole project took me about an hour and cost zero dollars.
Rub ‘N Buff is a wax-based liquid metallic paint. It’s fairly inexpensive and comes in several colors. The pewter turned out great because it wasn’t too shiny and fake looking. I desperately sought to escape the fake metal look, and another fake cover-up simply wouldn’t do. The tube in my possession was originally purchased for my kitchen cabinet hardware. I wanted to see how changing the hardware from bronze to silver looked. The Rub ‘N Buff did nothing for those cabinet doors, but man was it great on this chandelier.
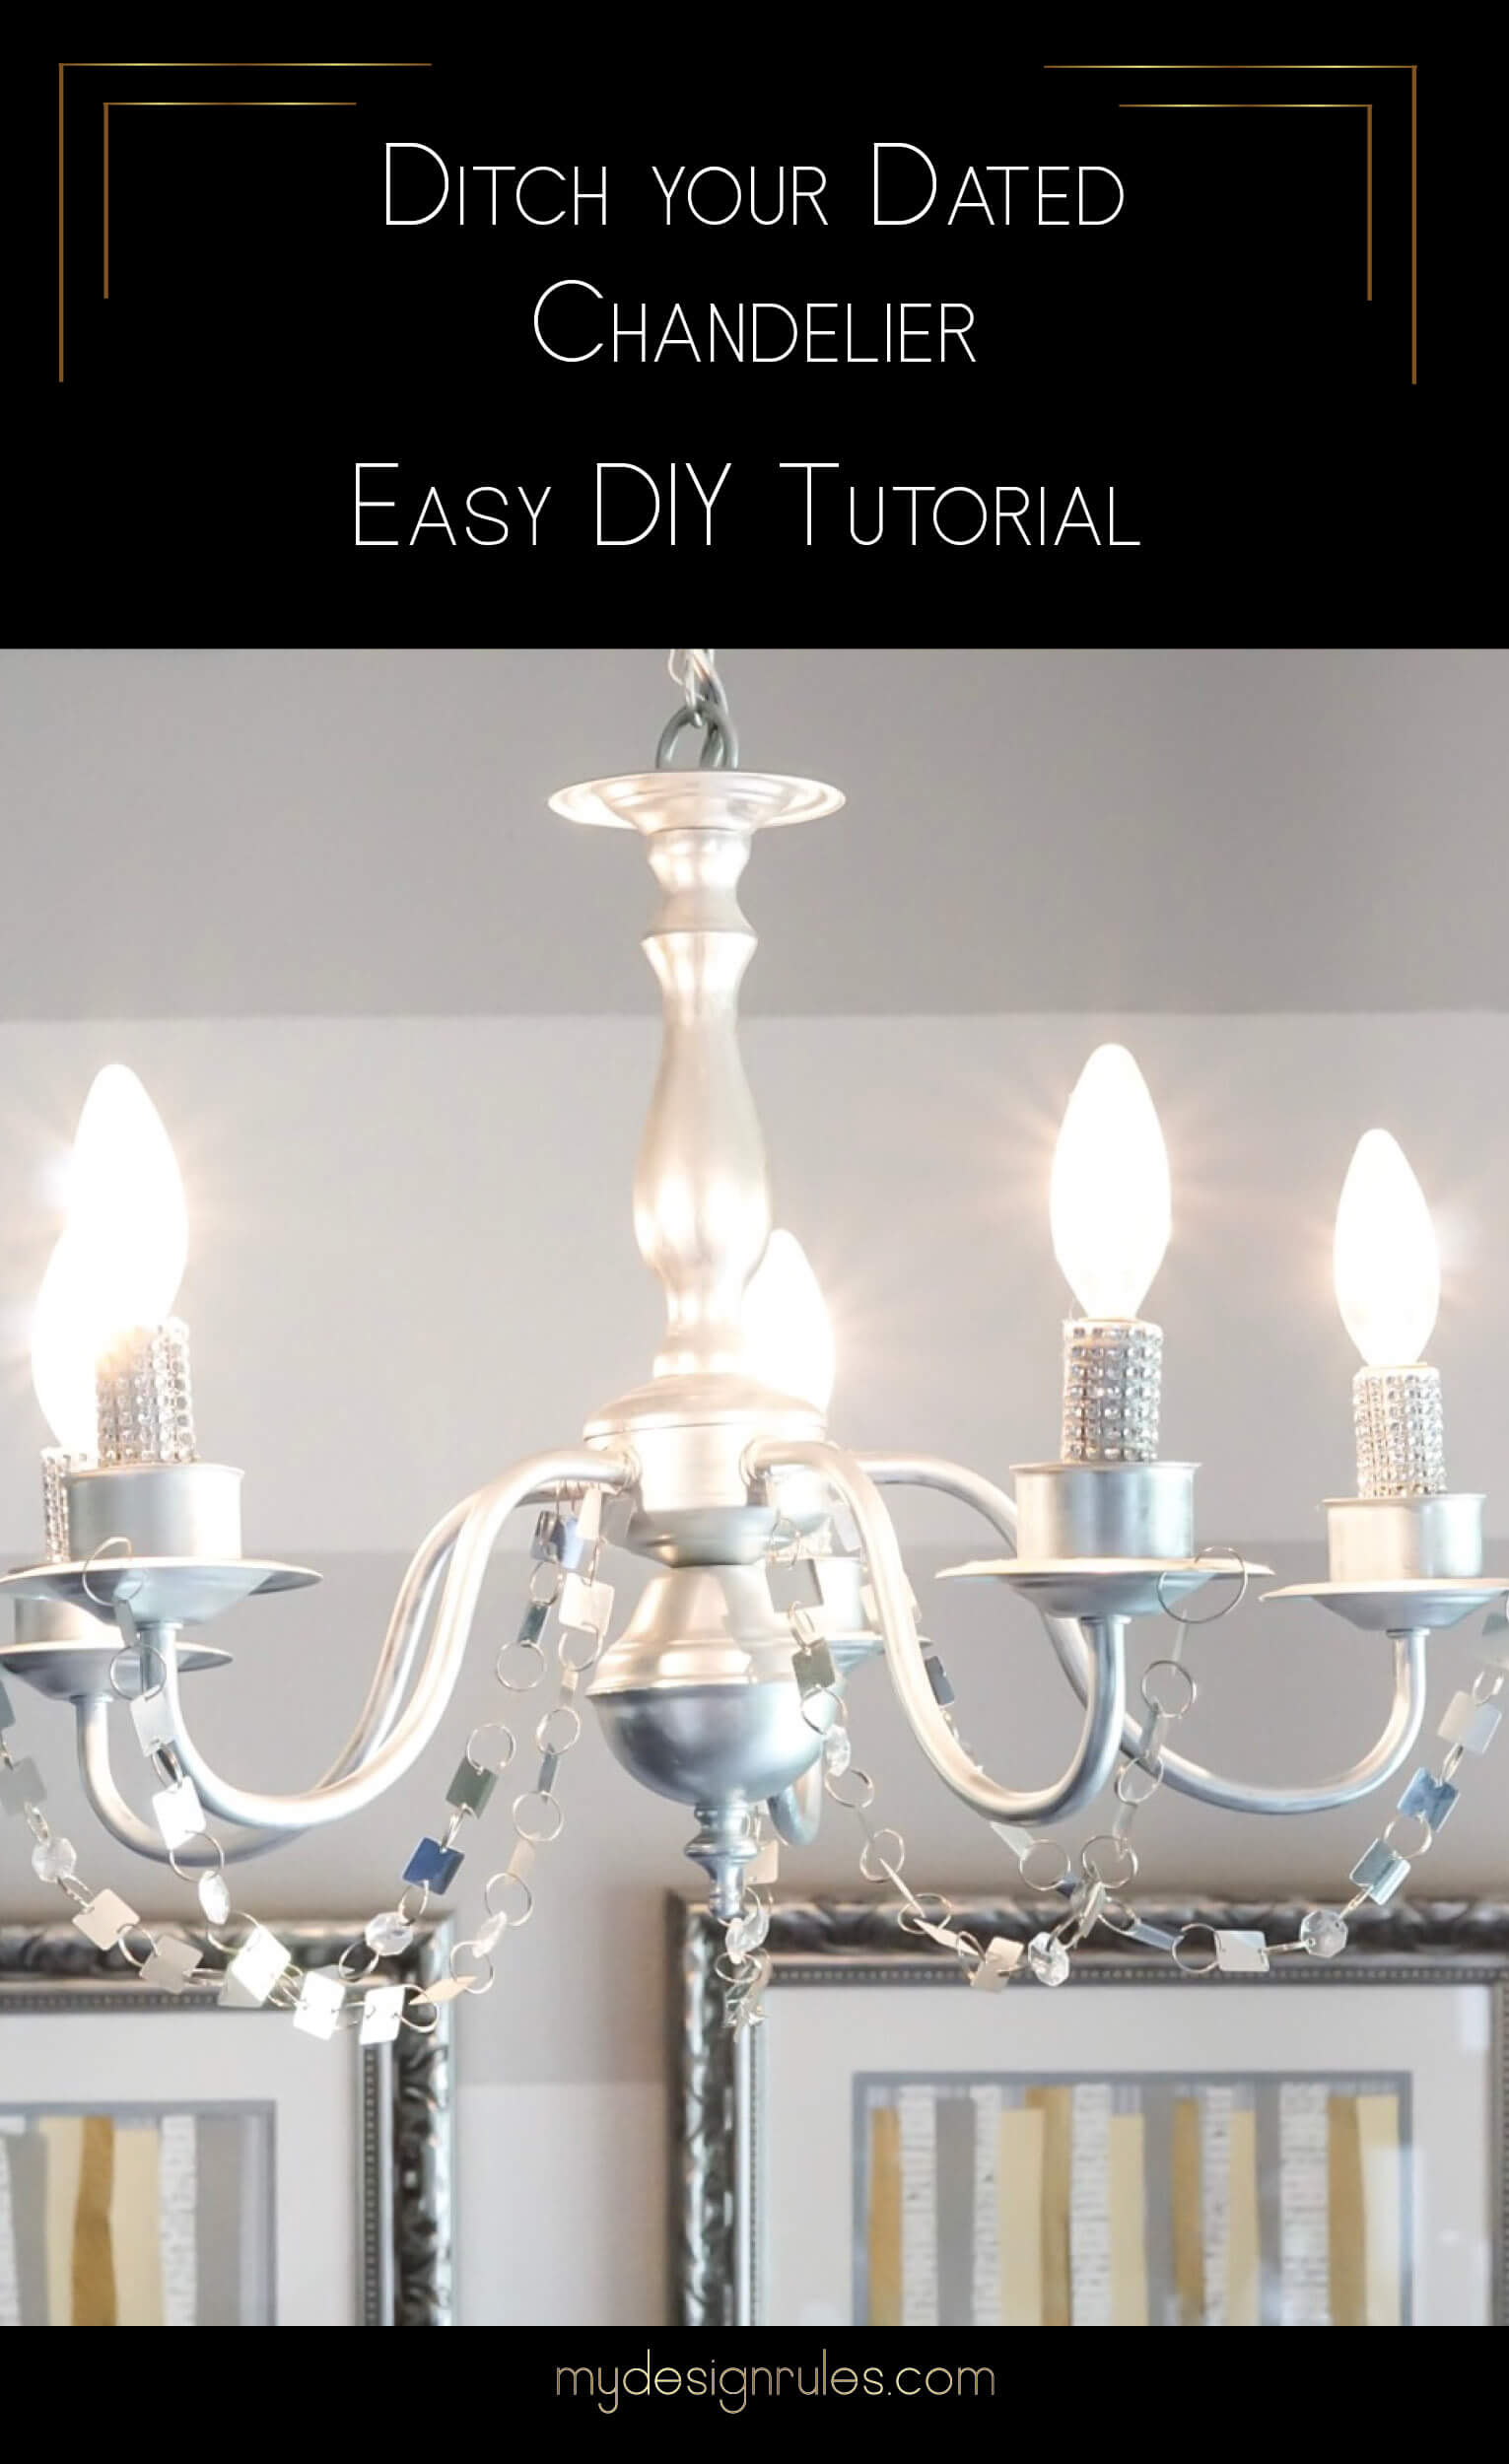
Here’s the super simple DIY Chandelier Tutorial.
Supplies
(affiliate links)
- 2 small microfiber cloths
- 1 Tube Rub ‘N Buff
- 1 Small artist paint brush (doesn’t have to be fancy)
- Paper plate
- Small roll of mesh crystals (link here but I found it in the Dollar Tree)
- Hanging Crystal Garland
How to Update Your Old Brass Chandelier
TIME INVESTMENT | About an hour | COST | About $20 if you have to purchase everything. $10 if you find the mesh at Dollar Tree. | EXPERIENCE LEVEL | Beginner
- Clean the dust and cobwebs off. Yes, I forget to dust up there sometimes and it was pretty gross. Use a soft or microfiber cloth and wipe well. I didn’t use any product because I wasn’t sure if the Rub ‘N Buff would react, change color or not adhere.
- Use your paper plate as a paint pallet and squirt a small amount onto the plate. A little goes a long way. I only need one tube and had plenty of it left. Using a small paintbrush, liberally apply the Rub ‘N Buff. Smooth even strokes prevent streaking. Make sure to get the chain, chord and ceiling medallion so everything is uniform.
- After a few minutes of dry time, buff it just a little. Use a soft cloth to gently polish away any streaks and imperfections. No elbow grease required here. Be careful not to rub off the product.
- Next, I used some crystal mesh that I had left over from a wedding to wrap around the lights bases. Measure and cut a template, then do the rest. Adhere the mesh with hot glue (a girl’s second best friend).
I planned to be done at that point and it looked pretty good, but I still felt like it was missing something. That made me go grab a few crystal strands from this wedding chandelier leftover from my sister’s wedding. I needed a 1/2 pea-sized dollop of glue to hold the crystals in place on each end.
That’s it. Easy peasy lemon squeezy as my son would say. Now she’s all glammed out and looks amazing against my striped wall.
Future Chandelier Goals
I do plan to eventually swap it out with one of these lovely ladies, but I have bigger fish to fry in the kitchen.
Option 1 | Option 2 | Option 3 (#AF)
I’m drawn to the open candle look on number two, it has a similar vibe to the one I have now, but it’s a little more contemporary. The current light also throws weird shadows at night, so I could avoid that whole issue by getting an option with shades or cups. I also love the fact that Option 3 is a little more versatile by being able to point the cups up or down.
Whatever I choose it will have to flow with lighting in the kitchen and living room. Check out the full dining room. The kitchen is still sporting a 1980’s hideous fluorescent drop ceiling light. (Why was that ever considered stylish?) My living room has a ceiling fan.
In any event, if you’ve got one of these 80’s babies, then give her a quick and easy update with just a few products and a little time.
What do you think of the update?
Rhonesha Bontemps says
I love the simplicity of it. Looks good and doesn’t look D-I-Y
Kenyatta Harris says
Thanks, it’s a really easy project anyone can do…even those who claim they have no DIY skills!
Becki says
This was a super cool way to make over an old chandelier, huge difference! Love it!
Kenyatta Harris says
Thanks Becki. Such a big change for so little effort.
Ola says
I love the way this turned out Kenyatta. I never heard of Rub and Buff before. I gotta get my hands on some of that.
Kenyatta Harris says
Rub ‘N Buff is sooo good and CHEAP! It’s great on everything.
Emy says
It looks great! Rub n Buff is amazing stuff!
Kenyatta Harris says
Isn’t it? The first time I tried it I fell in love!
Neelam says
Wow! I can’t believe the transformation. I had never head of Rub n Buff, I’ll have to experiment with it! Thanks for sharing.
xx
Neelam
Kenyatta Harris says
It’s a really cheap diy supply…if you don’t get crazy and buy every color.
Btw Naleem is such a cool name. Does it have a meaning?
Molly says
Really great results on this DIY! And I can’t wait to see how the fancy schmancy new chandelier looks someday too. I vote for option 3!
Morgan says
It looks amazing, Kenyatta! I spray painted a chandelier recently. Never ever used rub n’buff! Will have to look for it!
Kenyatta Harris says
I would have never considered Rub n Buff if it hadn’t been for laziness with making a spray tent.
Lidia says
Boom!!! Chandelier updated! Great idea on how to upcycle what you have!!
Kenyatta Harris says
Thanks Lidia! I love to use what I have on hand if at all possible.