I’ll admit it, I was a little chicken when I decided to paint my kitchen blue. As I searched through Pinterest for inspiration, I gravitated to those tuxedo kitchens. You know the ones with the dark-painted bottom cabinets and the light-colored uppers? So dreamy. My kitchen? Not so dreamy. It was super ugly and stuck in the 80s. Be forewarned ugly is an understatement. Here she is in all her glory.
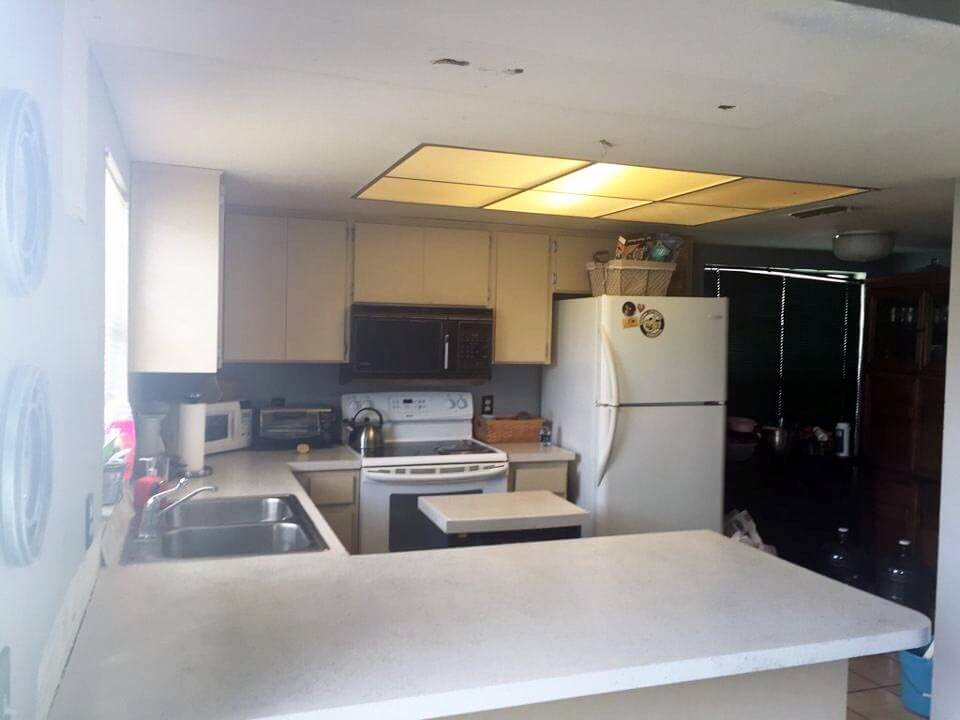
Mind you, this was after I refinished my countertops. This was also pre-blogging so bear with me on the bad photo. I used that dark corner area for storage.
BEIGE Everything. It was like walking around in a vanilla milkshake…without any sugar. Just tinted and cold. Nothing pleased the eye. It appears roomy, but really, it’s not. While there are a decent amount of cabinets, I have a very tiny pantry. I have nowhere to put my large serving dishes or occasional use appliances.
My plan: repurpose a piece of furniture for storage.
In an effort to solve my storage issues, I held onto an 80’s cabinet hand me down.
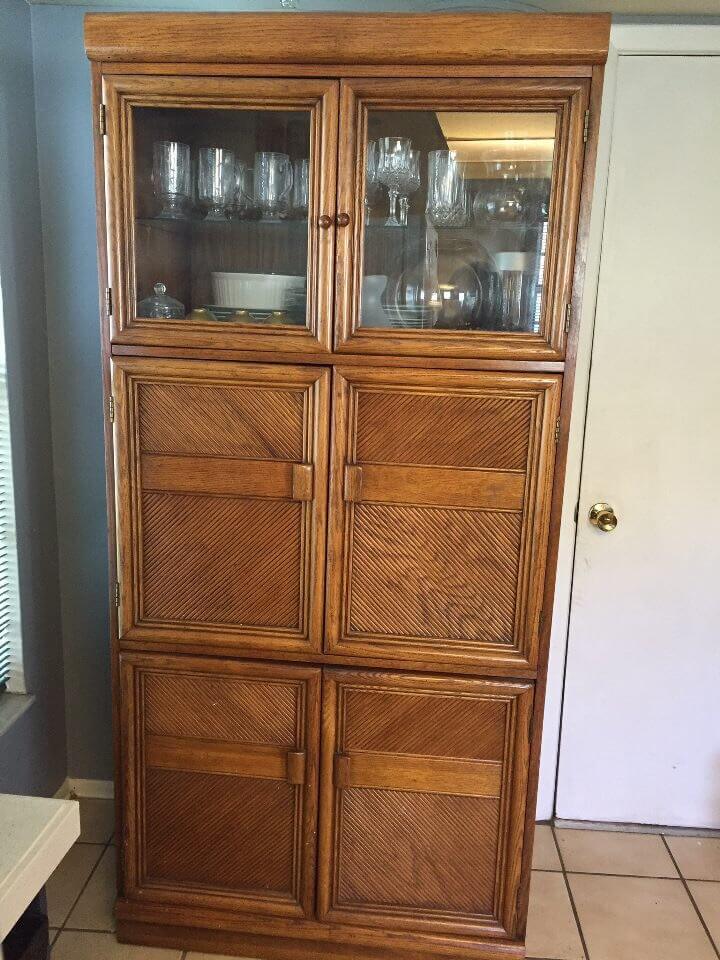
Pretty isn’t she. No, but really, I beautified her matching sister here. And she’s really gorgeous. I couldn’t keep both around; one was definitely jealous of the other so I sold it on OfferUp. The plan was to buy a buffet to hold the unsightlies and add open shelving to display my pretties. I still had dreams of that tuxedo kitchen so I jumped at the opportunity to try it out BEFORE spending hours painting my cabinets.
Oh, OfferUp how I love you.
Offer up is my go-to for good deals. It’s similar to Craig’s List, but you use an app on your phone to browse. The ap is photo-based so you can peruse very quickly. I searched for about a week for a buffet, but I couldn’t find one to fit. One day while scouring other folks’ leftovers, I scrolled past a never-used bathroom sink vanity that didn’t have a countertop. It was only $50 AND the seller was offering free delivery. Score! Two hours later, this was delivered to my door:
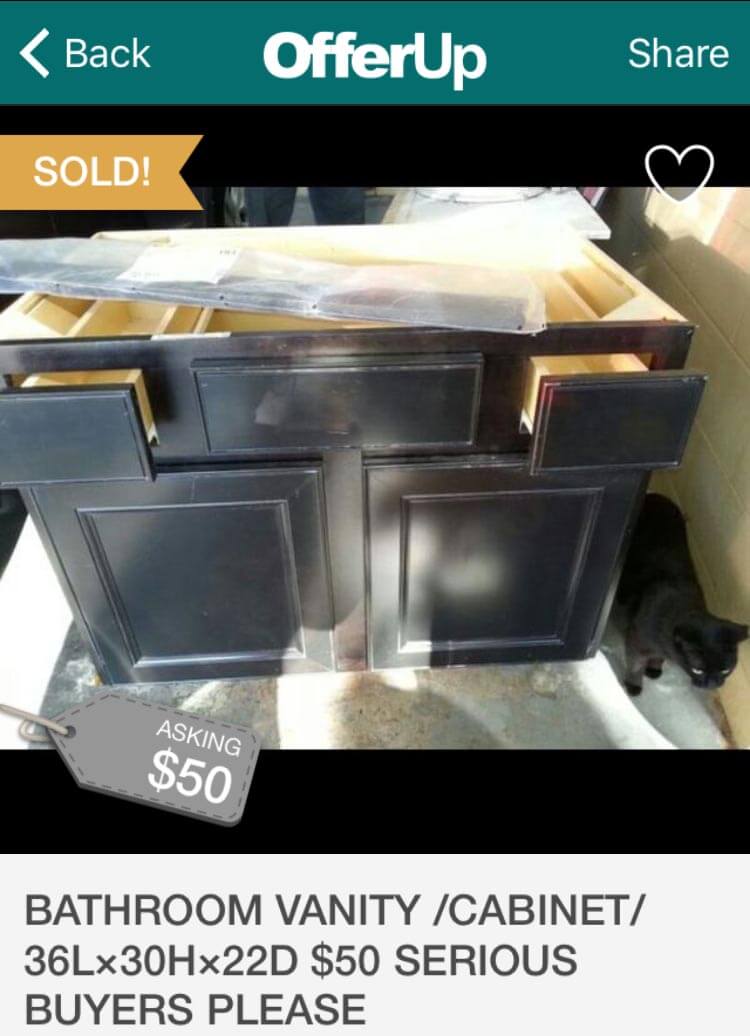
Excluding the cat of course. Not bad right?
I rolled up my sleeves and got to work.
Repurpose a cabinet in your kitchen before you attempt to paint.

If you use the Amazon links below, I receive a small commission. No additional cost to you, but it helps me out.
Supplies
- Gloves
- Drop Cloth
- Several old rags (for initial cleaning)
- TSP Substitute(optional)
- Sandpaper or sanding block (both 220 and 180 grit)
- Electric palm sander (optional)
- Soft bristle paint brush (I LOVE this Wooster Brush)
- Foam Roller
- Polycrylic (Miniwax) in Clear Satin
- Plywood Top Cut to size
- 4 small L-Brackets and 8 short small screws
Experience Level | Beginner | Cost | About $200 for all supplies excluding optional items. BUT I bought enough supplies for my entire kitchen upgrade. The paint and hardware you select will likely be your cost factor. I used pretty expensive paint and primer because it was for my entire kitchen and I wanted it to be GOOD!
Time Investment | 4 Hours working time; 4 Days including drying time
Prep the Cabinet for Paint
- Remove the doors and drawers. Clean with TSP substitute to remove all dirt and grease.
- Sand all surfaces you will paint.
I used a 180 grit sanding block. The buffet had a glossy surface so I wanted to give it as much tooth as possible. It didn’t take forever, but I wanted to make sure the paint adhered well. - Give it two coats of primer
I used Sherwin Williams Extreme Bond Primer. The salesman assured me it would work on any surface. The primer dried with a slight texture and gave me a bit of a scare, but I pressed on and it turned out fine. I lightly sanded the primer to even out the texture. Two coats of primer aren’t usually necessary, but this vanity needed it. - Paint with two coats of your chosen color paint using a combination of your brush and roller.
I used All Surface Enamel Sherwin Williams Indigo Batik. Everyone’s beloved Benjamin Moore Hale Navy lost the vote because I didn’t want my kitchen too dark. You can see I tested it out on the small cart below. Wayy too dark for me. Remember—this vanity was a guinea pig for the rest of the kitchen. That Indigo Batik is THE Beeesnees! OMG, I love it.After the first coat of paint.
-
After the second coat of paint. I waited for the paint to cure before adding hardware.
Let it dry for at least 4 hours in between coats.
I gave it a super light sanding between coats with a 220 grit sanding block. - Usually, I would say add a top coat of Polycrilic or another clear sealant.
I didn’t add a sealer or topcoat because the salesman assured me again the Sherwin Williams All Surface Enamel would dry rockhard… I used SW Proclassic before and it’s amazing, but it can’t be mixed in dark colors. Unfortunately, I didn’t have the same results with the enamel. Next time I’ll try something different. - Let the paint cure (fully dry and harden) for a few days.
- Measure your cabinet to determine the size you want your countertop.
Make sure you add at least an inch of overhang on the sides and the front.
Prepare the Counter Top
With measurements in hand, I trailed off to Lowe’s to find the smoothest piece of wood I could find. Lowe’s cut the wood free for me and I left with sandpaper and stain. Because I thought I wanted a butcher-block feel to it.
- Fill any holes or knots with wood filler.
- Sand your plywood until you get a smooth finish.
- Paint or stain your countertop.
By the time I got home, I had already changed my mind. Marble. I want marble. But er umm, I did not want contact paper!An artist I am not. I cannot draw to save my life. My stick figures are bad, but somehow, I got this idea to paint on marble. And you know what? It worked! I’ll do a tutorial on that process another time. So easy, I promise. - Attach top to base using small L-brackets and screws
I’ll be totally transparent…I bought the stuff and never actually affixed it due to laziness. The plywood will shift if you move it, but it’s heavy enough that it doesn’t move much and it doesn’t bother me. One day I will. Maybe. - Optional: add hardware.
I used this hardware template and this drill. I scored the handles on clearance at Target for $6.00 for a pack of 6. The knobs are gorgeous, but those babies set me back. They were $23 for a set of 10 and I needed two packages for the entire kitchen.
To finish off the area I picked up a roll of removable wallpaper from Target and two Ikea Lack shelves I snatched up for $5 each in the clearance section. They received the same treatment as the cabinet, except I painted them using Sherwin Williams Reflections. That’s the color I finally settled on after agonizing for weeks.
Here’s the whole set up all styled out.
Yes. I could certainly do this for the entire kitchen. Absolutely yes.
Update: See the progress of the vanilla kitchen here.
If you’re a chicken like me; test it out. That way you can move on to drooling about something else.
Because I love a good before and after…
I linked up this project in a few places:
Jeannee Taylor says
Kenyatta,
That piece turned out beautifully! Really love the color and the hardware is perfect!
Jeannee
Kenyatta Harris says
Thanks so much Jeannee! I’ve gotten so many compliments on the color!
Ola says
Oh my goodness Kenyatta! Great job. Well done, well done! I am a serious OfferUp fan. So glad to see someone else turning trash into treasure.
Kenyatta Harris says
I luvvve OfferUP. You just have to be quick on the draw. I missed an incredibly good deal earlier this week because I hesitated.
Black Friday Deals says
I just love it. It’s amazing. You did a wonderful job. Thanks for sharing this post.
STEPHANIE ABBOTT says
Such a pretty color choice. That turned out awesome. Featuring this at our Link Party tonight. Thanks for sharing!
Kenyatta Harris says
Oh my goodness thanks so much! I’ve gotten so many compliments on this color. It was bold, but such a great choice. I’m so excited to selected as a feature.
Gwyn says
I’m late to the game, but I love the Indigo Batik…I’m building a home and considering this for my island. You did such a good job! I hope you still love it.
Kenyatta Harris says
Thanks! I moved recently and I really miss my Indigo Batik kitchen cabinets, but at least I was able to bring this piece with me. It would look great on an island!