Nothing says welcome like a beautiful brightly colored wreath on your front door. And the great thing about wreaths is that they’re easy to make yourself.

When I first decided to put a non-seasonal wreath on my door, I really wanted to just buy it. For whatever reason, I had no mojo to make one.
Until I saw the prices.
I didn’t care for the pre-made wreaths I found at JoAnn’s or Michael’s, so I did some Etsy browsing. And oh, I found exactly what I was looking for: jaw-dropping, gorgeous works of art. But $60 for a wreath. uh no!
I admit sometimes I’m a little cheap, but there’s no way someone was going to sell me a piece of straw and ribbon for $60.
I admit sometimes I’m a little cheap, but there’s no way someone was going to sell me a piece of straw and ribbon for $60.So, I made a wreath myself. Cost me $20 and 20 minutes of time and I couldn’t have been happier with how it turned out.

For this one, I used neutral colored flowers that I didn’t have to worry about changing every season if I didn’t have the time. I found some crushed satin (I guess that’s what it’s called) in the remnant clearance at JoAnn’s and picked up a spool of satin ribbon. I used a combination of straight pins, floral wire, and hot glue to pull it all together.
This post contains affiliate links for your convenience. If you click on a link and make a purchase I earn a small commission to help me run this site at no cost to you. Read my full disclosure here.
But all good things come to an end and I had to banish wreath because time and weather happened. When it was time to update my sad front porch area, I knew I needed to breathe a little life into it.

Supplies for Spring (or Summer) Bright Front Door Wreath

Again, it cost about $20 and took no time to put together.
- Flowers, I bought ranunculus stems in three colors from Michael’s using a 50% off coupon and some greenery
- 2 spools of ribbon (one is sufficient if you have a thinner wrath form)
- Wreath Form (I used straw because I already had one, but I recommend this styrofoam form.)
- Hot glue gun and glue
- A stapler that opens flat or staple gun
- Floral wire is pictured, but I didn’t end up needing it.
How to make a beautiful floral wreath
Step 1-Wrap the wreath in ribbon
Use a small line of glue the on the underside of the wreath form. Hold the ribbon taught and continue wrapping around the form making sure you overlap the edges so the wreath form doesn’t show through. You also want to keep the ribbon as flat as possible. If it puckers or buckles adjust your wrapping. Secure the end with another line of glue.


Step 2-Add flowers and greenery to the wreath
Play around with different configurations of flowers and greenery until you find a good combo. I started with the greenery and removed all the excess stems from the flowers. This took all of five minutes. Be careful to keep the orientation of the wreath in place. Secure the flowers with hot glue making sure you adhere them to the face of the wreath. It’s easy to place them too low or too high. If you have any flyaway petals use a small dollop of hot glue to keep them in check.
TIP: Add your flowers to areas of the wreath that may not have gotten the best wrapping.

Step 3-Hang your bright beautiful spring wreath.
To hang this chunky floral wreath, use more of the brown ribbon and string it through your wreath. Measure how low you want it to hang and cut. Next, staple the ends to the top of your door. It’s so thin that you won’t have to worry about it impeding the door opening and closing.
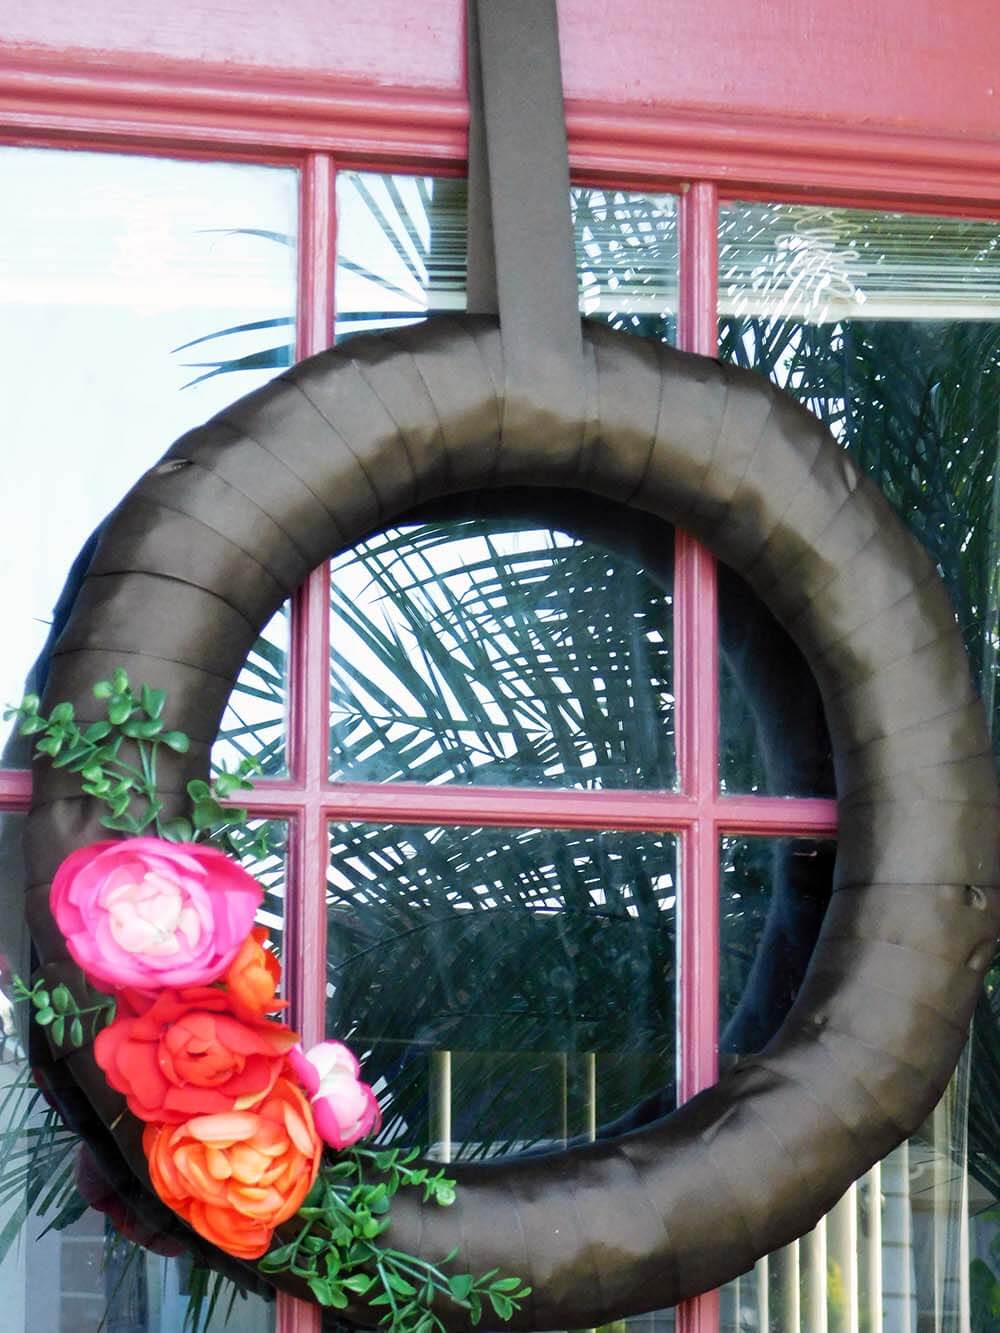
Note about the photos: I wanted a more modern look so I tried using the flat wreath forms—but it didn’t add enough dimension to my door so I ended up using the straw form. The instructions are the same for both wreaths. Someone forgot to take photos of the final step of the completed flat wreath form before I disassembled it to make a beefier one.
I love instant gratification projects. You can take this concept and add any embellishments you like. So so easy, to make but it’s like a great big ole smile from your front door welcoming you home from a long tiring day.


Tara Adams says
It’s so pretty. I’ll take making my own for $20 than paying $60 for one. I always thought they were complicated to make since they can cost so much.