![]()
A mood board will become your new playground for decorating.
Let’s be honest, shopping is probably the best part of decorating. But shopping without a plan is a set up for buyer remorse, or worse, expensive purchases that don’t work with your design scheme. I’m going to show you how to design your room like a pro without leaving your couch or spending a dollar. Ready?
We’re creating a mood board—a mockup of the room you envision. Your mood board will give you a major confidence boost before you make one purchase. If you have trouble seeing the big picture before it’s drawn, then mood boards will be your new BFF. My super creative peeps who gravitate to every pretty thing in the store–I introduce you to your restraining order.
Have trouble seeing the big picture before it’s drawn? Then mood boards will be your new BFFCreate a Mood Board with hierarchy
When you defined your signature style, three main components ruled: Function, Feeling and Fashion. Your mood board will capture all three of these elements to help you visualize the harmony they create.
Function is your number one priority, followed by Feeling and lastly, Fashion. I’ve seen many a pretty room that I wouldn’t want to live in. Remember those cute shoes that hurt your feet? Same principle here. If you start with function and don’t forget about fashion, you’ll end up with a win-win. Bunion free toes anyone?
Jot down a brief list of items that will make your room livable. I’m working on my master bedroom. Here’s a shortlist of my must-have pieces.
- King Size Bed with drawers for storage
- 6 to 9-drawer dresser or chest
- 2 night stands, with 3 drawers
- 8×10 area rug
- 96” window treatments
- Full-Length Mirror
- Lighting
Even if I were to choose style-less furniture, the room would at least be comfortable for me and the hubster. Make your list specific to save shopping and searching time. If something doesn’t fit the bill, move on quickly.
With your list in hand, remember to reference your style words for Feeling and Fashion and work with the color palette you created here.
Create a Mood board Using Microsoft PowerPoint
Here’s the short of it with words and pictures.
- Open a new document in Microsoft PowerPoint.
- Use a blank white background.
- Do a little window shopping for your favorite items with your fashion words and color scheme as a guide. Try to find images that are free of styling and have a white background. Save any links to items you may purchase in a spreadsheet or Word Document for later reference.
- Once you find an image, right click to copy the image. Paste it into your document. You can also simply drag the image over. Take a screenshot of images that are hard to download. To take a screenshot on a Mac, use Command + 4. The image will save as a .png on your desktop. On a PC, use the Print Screen key on your keyboard and paste it into the document.
- Crop out as much of the background as possible and size it to fit your page. Tip: Hold down the shift key while you resize it to keep proportions intact.

- To change the orientation of photos, use the Flip Objects Tool.

- To layer images, use the Remove Background Tool…
- Then click use the Arrange tool to Send images to the Back or Bring to Front.
- Play around with different items until you come up with a look you like. If you have items you want to DIY, use substitute lookalikes you find online.
That’s it!
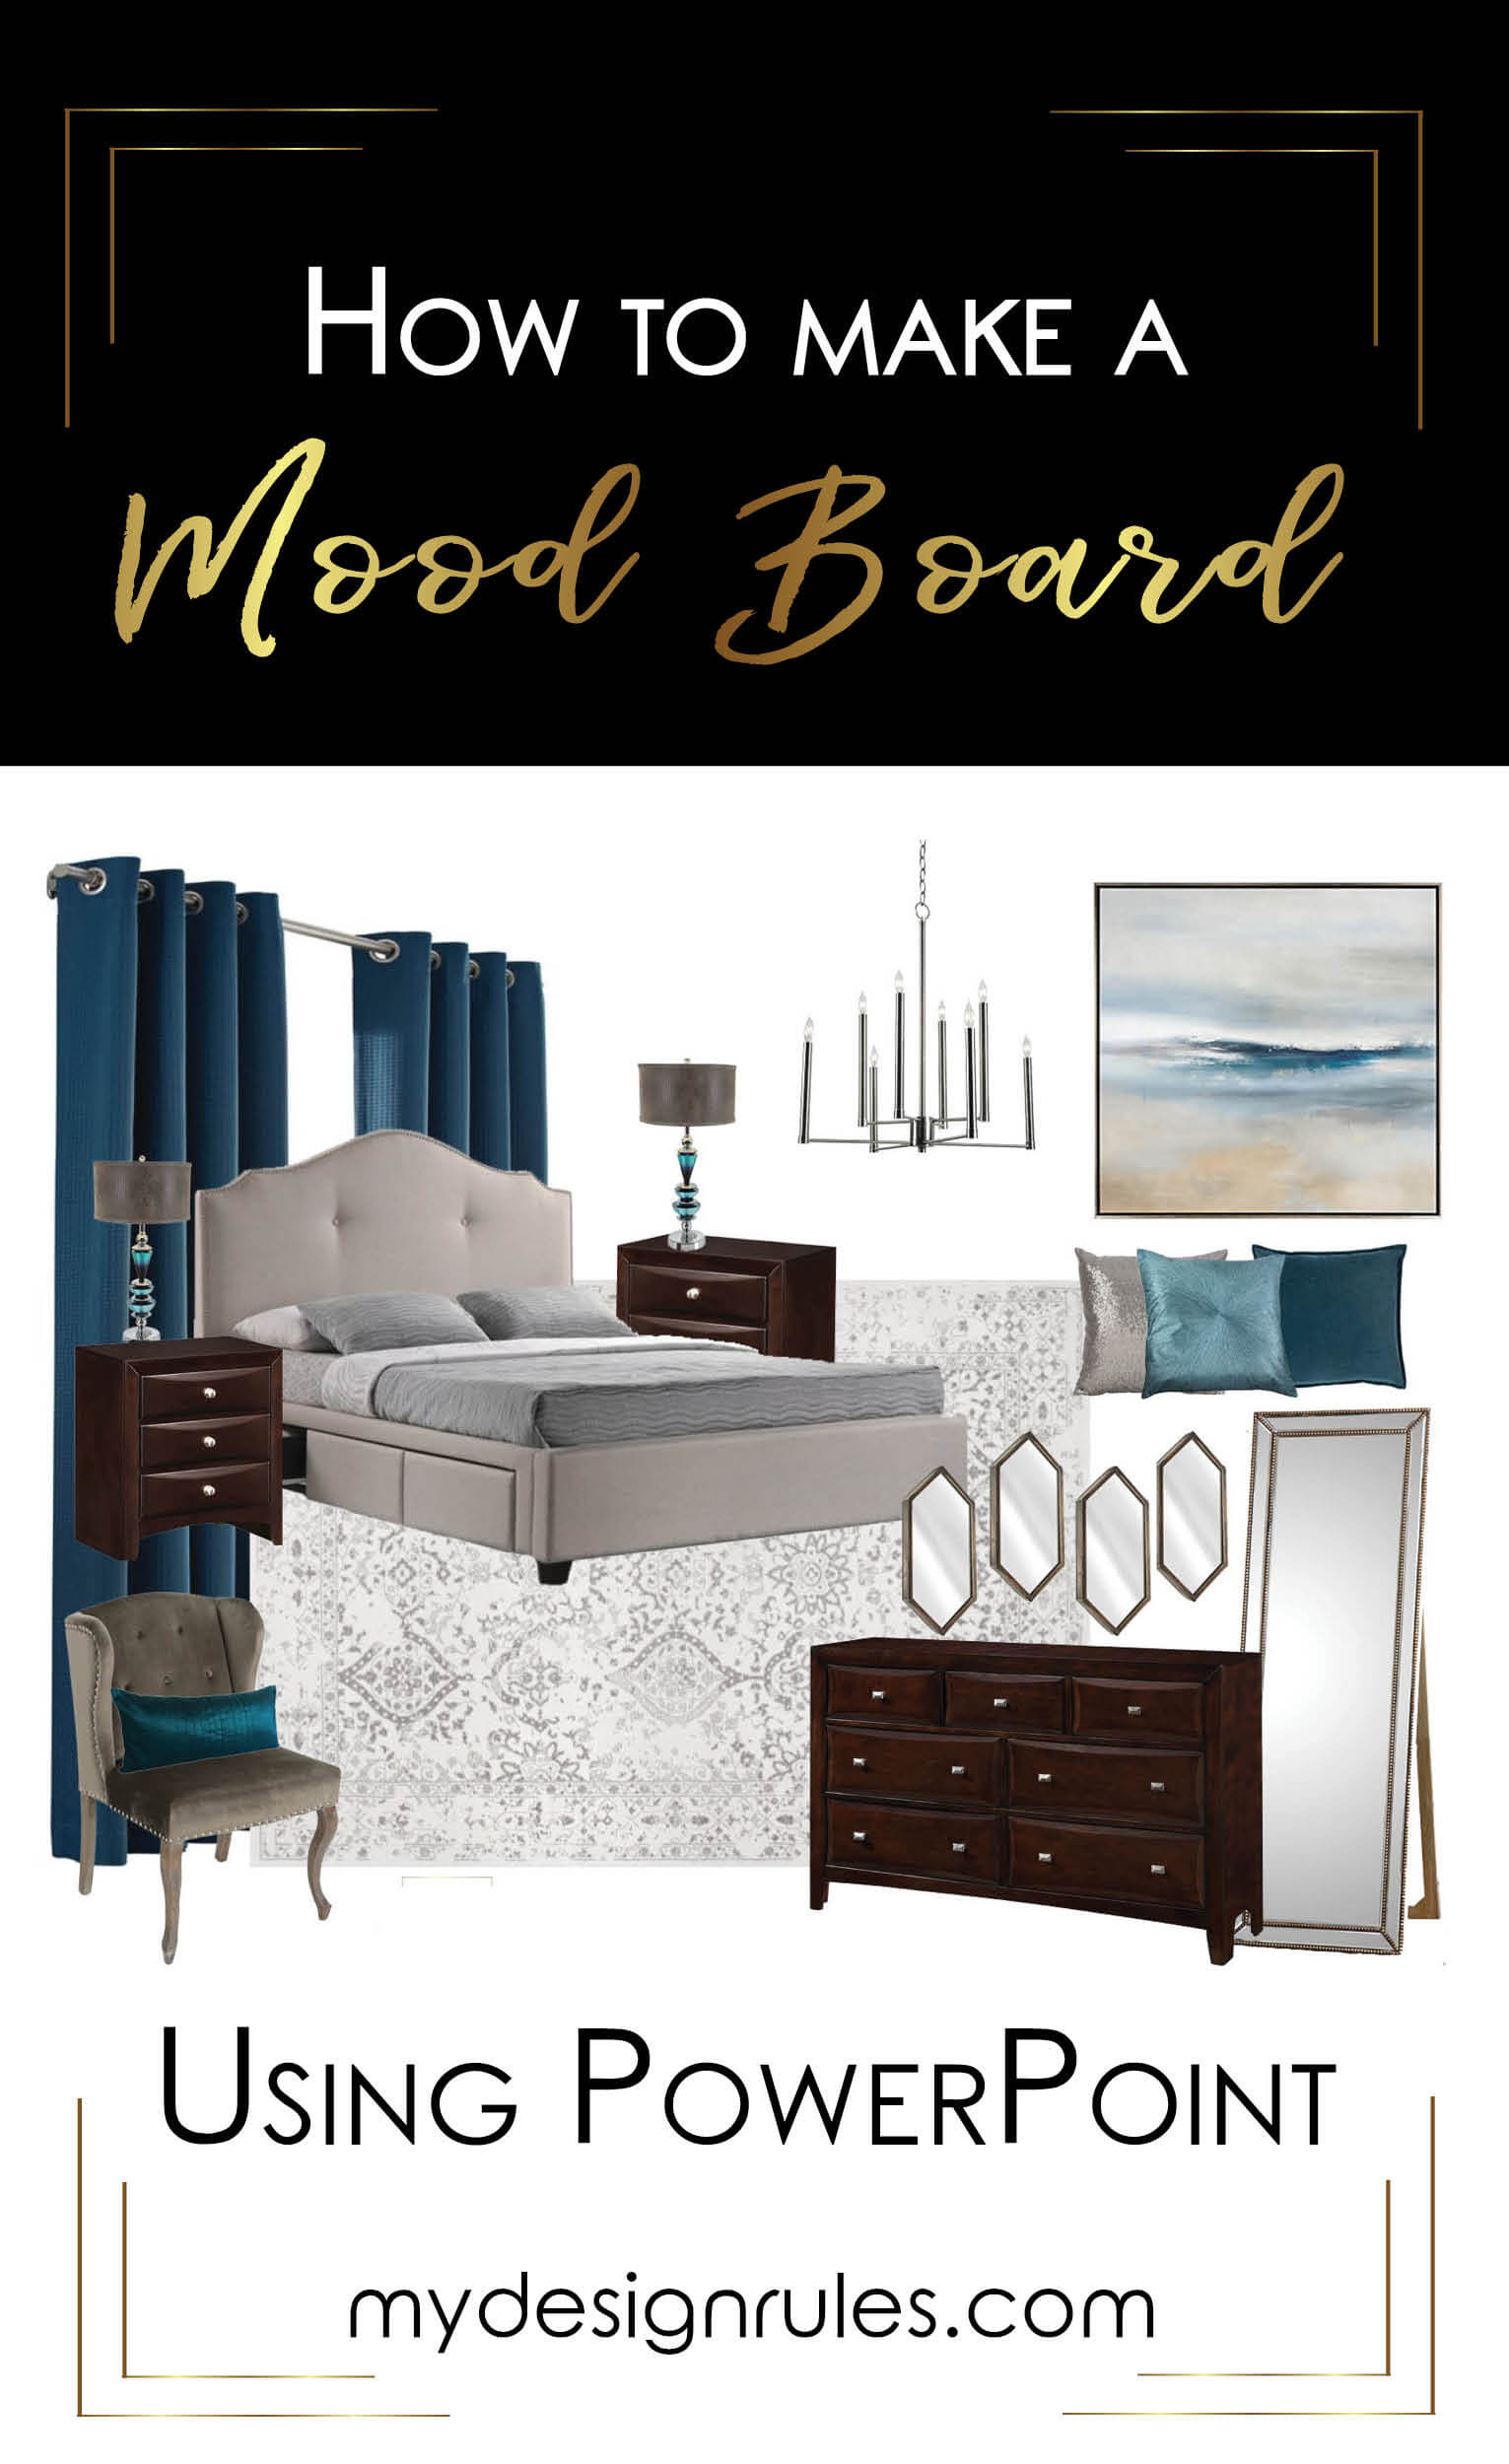
My Master Bedroom Mood Board
Here’s my hubby approved mood board for the room. I spent about an hour online shopping to put it together. My first draft was all neutrals (first photo above, which honestly, I loved but my sister convinced me to add color. So GLAD I listened. I really do like the addition of teal. I tend towards neutrals and when I venture off…it’s usually in the blue family. If I were designing for just me, I’d jettison those dark dressers, but alas…I’m married to a man who loves dark wood. I had to compromise somewhere to get my upholstered bed. He’d prefer wood there too.
Don’t get caught up in trying to create a work of art. Your mood board is for you. It also doesn’t have to include every single item you want to buy. Include the major players and a few accessories that will keep you on track. Remember this is a tool, not an exact replica of your room. While your mood board isn’t a guarantee against mistakes, it will save you a lot of future headaches.
I reeallly wanna see what you come up with! Post it on my wall on Facebook!
Marie says
Love it! It’s like a digital vision board.
Kenyatta Harris says
Exactly a digital vision board! So easy to see what everything looks like together.