Yes, you can change the color of the chair legs– it’s easy and cheap. If you stumbled across a gorgeous chair but hate the color of its legs. I’ve got great news. This simple process will have your seat looking good in no time.
So I bought some cute blue chairs for my den. They were perfectly priced and perfectly sized but the orange legs they were sporting were just a NO. I hated them. But not enough to pass on the chair itself. I closed my eyes and hit the order button knowing I’d have to change the leg color when they arrived. And I was NOT wrong.
RELATED: Update Old Furniture with General Finishes Java Gel Stain

This post contains affiliate links for your convenience. If you click on a link and make a purchase I earn a small commission to help me run this site at no cost to you. Read my full disclosure here.
I purchased them to serve as extra guest seating (and to deter my hubby from buying an Al Bundy recliner). We spend most of our time on the uber comfortable sectional. When we have company we need a few more spots.
These chairs are soft and comfortable. They’re not workhorses and probably won’t last for 10 years. But they’re blue so I don’t need them to. I may change my mind about them later down the road and didn’t want to invest in super high-quality pieces.
My philosophy is to invest in classic furniture that will stand the test of time and go cheap inexpensive on trendy accessories. My sofa is a workhorse. These chairs?…we’ll see. They have ok reviews for what it’s worth.
Any way onto ways to change leg color. Here’s what I was working with. Love the chair hate the orange.
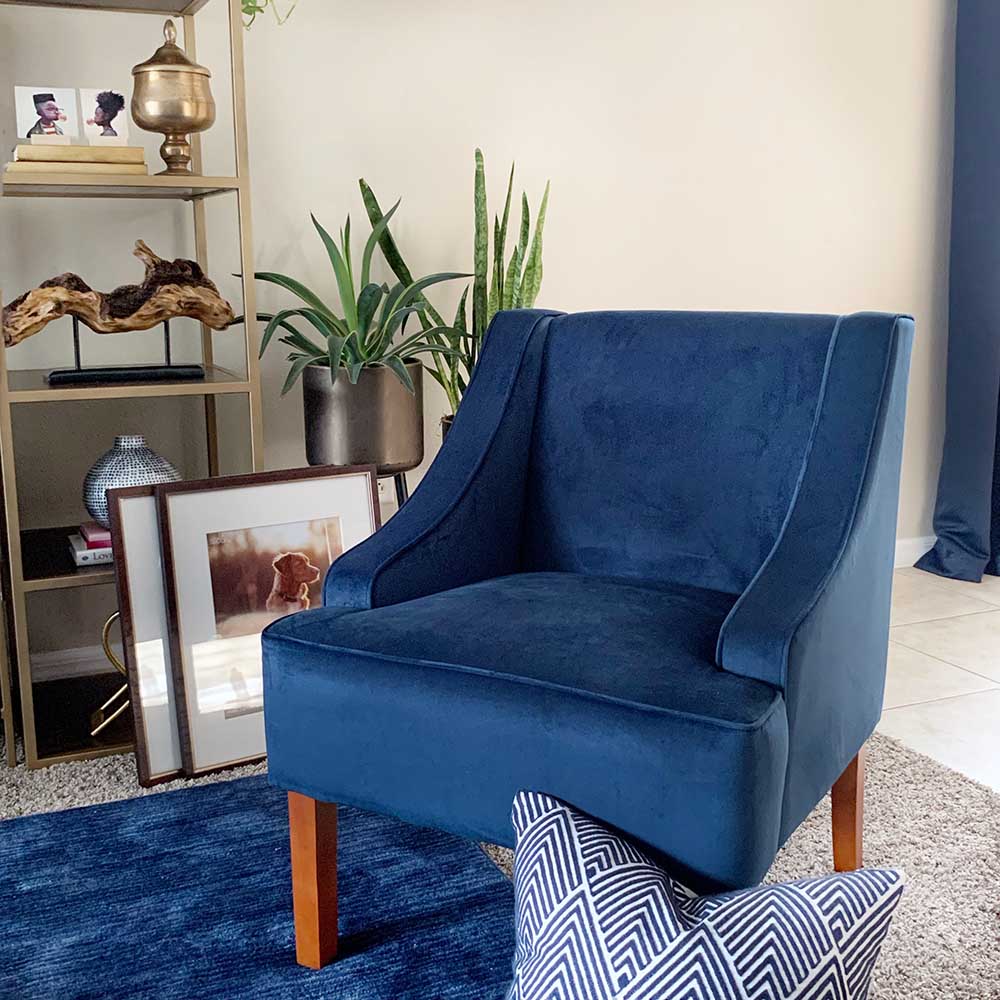
Two ways to change the color of your chair legs
How to darken your chair legs with gel stain (how I did it)
So here’s how I changed my chair leg color: (you can also check out my highlight on Instagram for more video:

I started out thinking the I could just use regular stain to darken the legs. Not so. The stain didn’t do a thing to the finish of these chairs after a light sanding.
Luckily for me, I noticed they were actually wood when I sanded a little too deep in one spot. (Albeit poor quality wood but wood nonetheless.) With that knowledge, I gave the chairs a deep sanding to remove the ugly orange finish and topcoat. I used 60-grit sandpaper and my electric palm sander. It took me about 10 minutes to do all four legs on all four sides.

That left me with this:
So I pulled out this stain leftover from another project and commenced with adding two coats. I used gloves and an old rag to wipe on the stain and wipe off any excess immediately. whomp whomp. It was a fail.
Because the wood is cheap, the regular stain didn’t take as even evenly. Sooo I started all over again and used this gel stain in Kona for a much better result.
A caveat for using gel stain to update furniture legs
Instead of a paintbrush or rag, this time I used a stiff foam brush (read NOT the Dolla Tree cheapie pack). It cost me about 70 cents. And I just discarded it after I was done.
I highly suggest you use a gel stain. It covers more like paint but will let some wood show through. The gel stain goes on like paint and you can even use it on plastic.
If you’re working with wood, you can leave it on dense like paint or wipe off the excess. I suggest you test an inconspicuous spot. The longer the stain sits the darker your color will be.
Be careful! A little goes a long way. Use smooth strokes to even out the stain Use a rag or paper towel to remove excess stain.
Oil-based paints and stain require a much longer dry time between coating and sealing. I only needed one coat of stain, but if you do two, wait at least two hours in between coats. And here’s the biggie. Before you can add a topcoat, you need to wait eight hours before adding an oil-based topcoat and 24 hours if you’re using a water-based topcoat. Polycrylic (my go-to) is water-based so I had to wait it out.
Add that to the two hours between coats of top coat and it’s a long waiting game. But the working time is less than an hour total for the entire project!
RELATED: Designing a Blue Family Room
Tips for adding the topcoat on your legs.
Here’ where you want to use a nice quality brush. Softer bristles will help give you an even finish. To apply your topcoat use as little product as possible. The directions say to sand in between coats, but I’m a lazy DIY-er and I didn’t. Be mindful of corners and drips. You WILL see them if they dry like that.
Polycrylic goes on milky but dries clear. If you see milky build-up and/or drips–wipe them immediately. If it begins to dry you’ll have to sand it out later. you need at least two coats. AND PLEASE…wash your brush out in between coats. You don’t want the poly to dry and ruin your brush.
After you finish the waiting game, then screw your leg back in (or remove tape) and plop down in your updated creation.
Update Your Chair by Painting the chair legs
Now if you’re buying cheap furniture online…chances are your legs are NOT wood. Whomp whomp. They’re either plastic or some type of wood composite. Neither of which will take a stain well. In that case, I highly recommend painting them.
Before you put the chair together, grab some decent furniture paint in the right color, and go to town. You can use this method to make your chair legs lighter or darker. If you have a thrifted or second-hand chair that can’t be dismantled, tape off any part of the chair that you don’t want paint on beforehand.
Give the legs a light sanding using 110 sandpaper. You just want to rough up the surface. Using a soft-bristled paintbrush, give nice long-but-even strokes of paint to your chair.
Let the paint dry. Then give it a second coat. After the second coat give it two coats of sealer. (See above tips on using a topcoat)
Changing your chair leg color is a pretty painless process. You spend more time waiting for coats of stain and sealer to dry than working time. But the end product is a chair you love with good looking legs you’re not ashamed of.
Janet says
If I was going to skip the attempt to stain and go straight to painting the legs would I need to sand as much as you did? would I need to primer before paint?
Kenyatta says
I am TERRIBLY sorry I didn’t reply. my email notifications stopped coming through.
I would prime if you’re painting and just scuff sand.
Ophelia Fitzgerald says
Such a simple yet effective way to refresh furniture! Love how easy this DIY upgrade is.
Diana says
I got here googling to find out how to fix the legs of this exact chair 😆